In this equipment repair video, I evaluate my Husky air compressor is not pressurizing. I don’t know a lot about air compressors other than there is a motor that runs a pump to build up pressure in a tank. During this repair, I learned more about air compressor mechanics and I will share that here with you in this article.
Why Did I Keep This Old Compressor
Now that I built a shed, I’m cleaning up my garage and moving stuff into the shed. After rediscovering this old compressor that I had sitting I remembered that I had intentions of fixing it. That’s why we are here. I have since purchased a replacement compressor that performs much better. But, it’s nice to have this old one as a spare. And, I enjoy restoring equipment that can be fixed without spending too much money. It’s rewarding to me as it helps me to learn more about equipment repair and mechanics.
Video Chapters
- 0:00 My Air Compressor Will Not Pressurize
- 2:10 Evaluating the problem
- 3:40 Removing the head body to inspect valve plate
- 5:45 Valve plate has a broken valve
- 6:43 Replacing the single valve plate with double valve plate
- 12:00 Preparing to install new piston ring
- 14:04 Removing fan (reverse threads)
- 14:40 Removing connecting rod from flywheel bearing
- 15:18 Installing piston ring on connecting rod
- 15:55 Installing piston into piston cylinder and installing connecting rod onto bearing
- 16:49 Installing double valve plate and pump head
- 17:37 Installing fan onto flywheel (reverse threads)
- 18:25 Compressor now reaches 125 psi
Why My Air Compressor Is Not Pressurizing
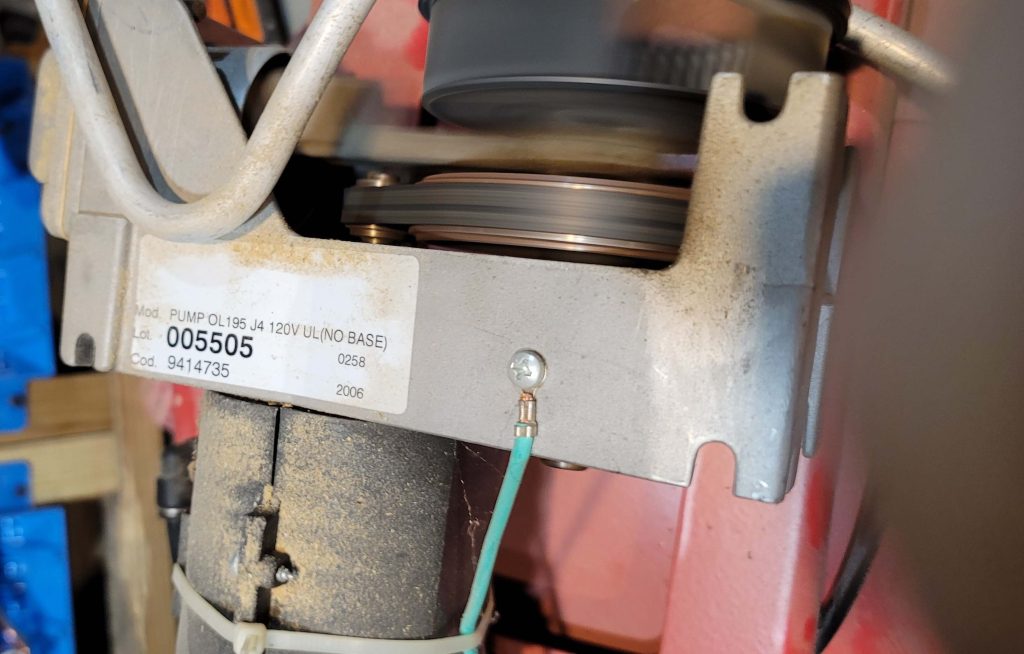
If your compressor is not building pressure it could be because of a faulty valve plate or piston ring. Of course, there could be other reasons, but this is what I found in my case. In this video, I show you how I diagnose my Husky pancake compressor problems and fix them. The compressor pump on this unit is model number OL195. It is used in some Husky, Stanley, and Bostitch models and others. The model number is imprinted on the pump for easy identification.
General Compressor Mechanics
Many oil-less air compressor pumps are built with a motor that spins a flywheel, which has a connecting rod and piston assembly that pushes air through a cylinder. This compressed air feeds into a valve plate and pump head. This assembly supplies air into the compressor through a check valve, which prevents the compressor from losing air back through the pump head.
The compressor pump is controlled by a pressure switch with built-in hysteresis. The hysteresis could be set for 25 psi with a max pressure of 125 psi. This would mean that the pump will kick on when the pressure is below 100 psi and will turn off around 125 psi. But, what if the pump never shuts off? If everything is working properly in the compressor but the pressure switch, then the tank could burst. That’s why compressors are supplied with pressure relief valves to trip at a higher pressure, like 150 psi.
Evaluating The Problem
The particular problem with my compressor is that it builds up pressure to around 45 psi but doesn’t exceed it. The compressor doesn’t lose pressure, which means that the check valve is ok and all hoses beyond the check valve are good. The problem could be within my pump itself. Another problem is that the pump never shuts off since it isn’t achieving the maximum pressure of 125 psi. This could result in damage to the pump and motor and could create a fire hazard from overheating.
The parts diagram for my compressor pump is available online. Chances are high that the parts diagram for your compressor and pump are available online as well. The OL195 diagram is available on several websites where you can order replacement parts. The model OL195 pump on my compressor was assembled using the single valve plate. I upgraded to the double valve plate, which also required replacing the connecting rod cap for the piston. The double valve plate kit part number is AB-9429999. You may also see model information such as Bostitch CAP60P-OF, which uses the OL195 pump.
Disassembling The Pump
My first guess was the valve in the pump was bad. Once I disassembled it I quickly noticed a broken valve plate. I knew then that I needed to order the replacement valve head. My head was the single valve plate but I upgraded to the double valve plate. The double valve plate kit that I ordered also included a solid piston cap since the double valve plate has the intake built into it. The lead time on these parts is around 3 weeks so be patient.
Fixing The Compressor
Once I received the double valve plate I was quick to replace it. After removing the head a few times already this was easy. I used a 3/16 Allen key to remove the 4 pump head bolts and removed the single valve plate and pump head. I also removed the piston cap using a T-20 bit and installed the new solid piston cap. Then, I reassembled the pump head and switched it on. The pump achieved a pressure of around 110PSI but no higher.
Evaluating Why The Compressor Won’t Reach Max Pressure
The last thing that I could consider replacing was the piston ring. Looking down the piston cylinder I could see gaps between the old piston ring and the piston cylinder. That tiny gap could easily explain why the pressure would not go beyond 110psi. This piston ring was received in a couple of days and I got to work on replacing it.
Replacing The Piston Ring
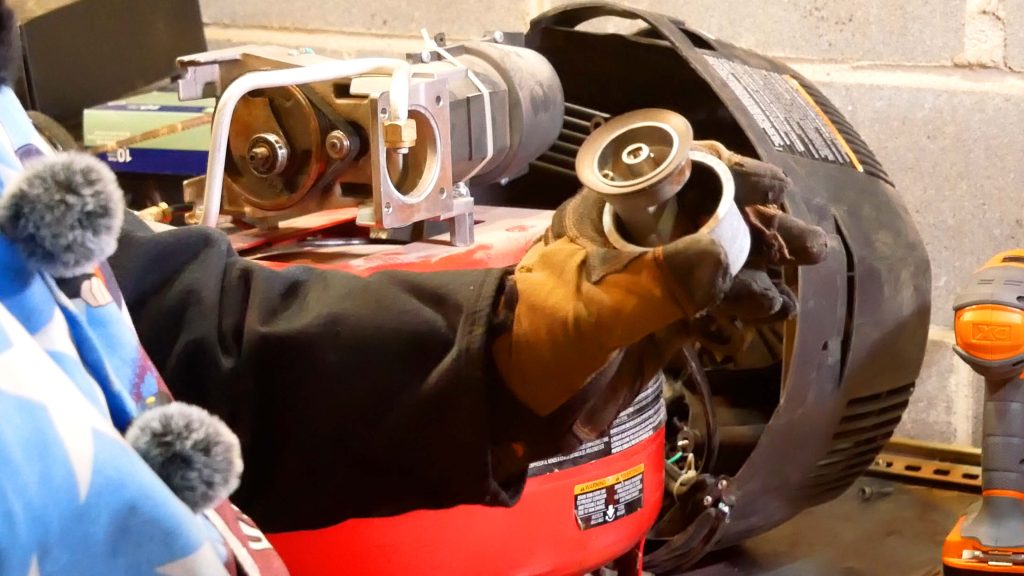
Replacing the piston ring took a little more effort as I needed to remove the connecting rod from the flywheel bearing. The connecting rod is pressed onto the bearing and it is a very tight fit. I was able to remove it using two very long screwdrivers to act as pry bars. Once removed, I was able to install the piston ring and install the piston cap. Then I was able to press the piston into the cylinder using my Jorgensen E-Z hold clamp. Reinstalling the connecting rod onto the bearing took a little more effort. I used a C-Clamp to do this as shown in the video.
Testing The Fixes
Once everything was put back together I turned on the pump and it took 12 minutes to achieve 125PSI. But, it works and my fix worked as expected.
My Thoughts On DIY Repair
The reason I do things on my own is a desire to learn and the unwillingness to spend money on other people’s efforts. I could have easily junked this compressor and thrown it out for scrap. I had a very basic understanding of compressor mechanics before beginning this. Although I’m not an expert after this process I now feel very confident that I can explain the compressor design and operation. And any compressor problem I encounter in the future I will be more confident in my approach to fixing it.
Tools And Parts
Here are the parts that I ordered:
Here are the tools that I used to fix the compressor:
- Ball-End Allen Bits
- Milwaukee Shockwave Impact Driver Bit Set
- Loctite Threadlocker Blue 242
- Craftsman Mechanics Tool Set
- Ridgid Drill and Driver
- C-Clamp
“As an Amazon Associate I earn from qualifying purchases.”
Video Credits:
Video Production: U Do It™️ Studios a Division of No Cheese Records® LLC All Rights Reserved.
Picked out for you
Equipment Repair – Husky Air Compressor Won’t Exceed 40PSI – By U Do It
Quickly Clean your Concrete and Siding with this Pressure Washer – By U Do It
Cleaning Two-Story Gutters with a Pressure Washer – By U Do It
How to clean siding on a 2 story house with a pressure washer – By U Do It
My Pressure Washer Won’t Stay Running – How to Fix – By U Do It
My Pressure Washer Won’t Start – By U Do It
Replacing an Edger Blade is Easy with the Right Tools Video – By U Do It
DIY Acoustic Panels for Better Sound Treatment – By U Do It
Garage Door Won’t Stay Opened Unless I Hold the Button Down – By U Do It
How to paint two tone colors with a laser level – By U Do It
How to install a GFI outlet in basement from start to finish – By U Do It
Repair a Leaky Gutter with Flex Seal – By U Do It
Replace your air filter as part of your regular maintenance – By U Do It
Design of the Day
Follow U Do It on Social Media
What’s next? Check out About U Do It, History of U Do It, and Mrs U Do It to learn even more about U Do It.

