
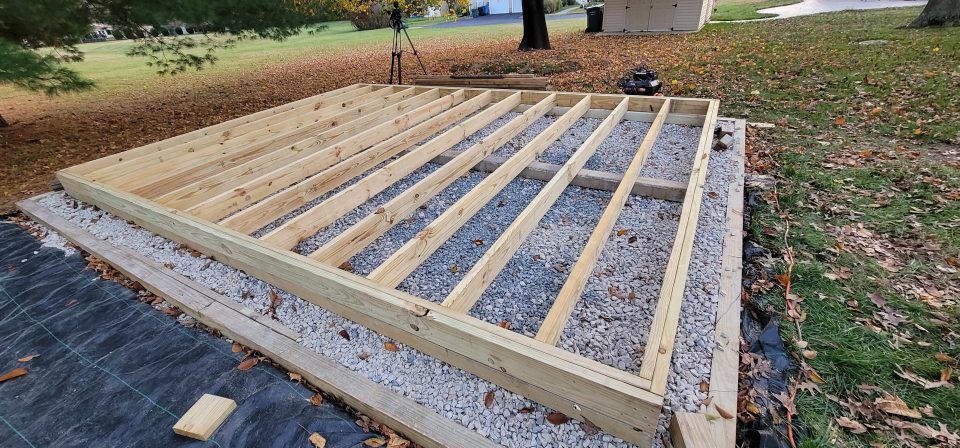
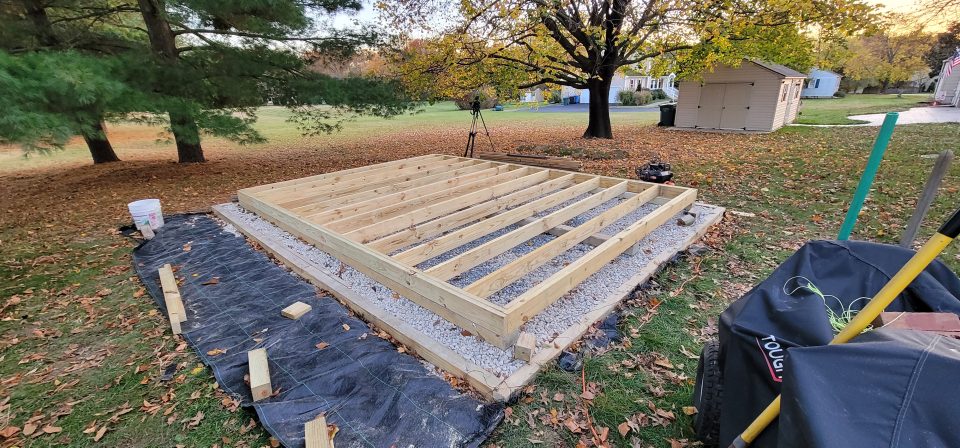
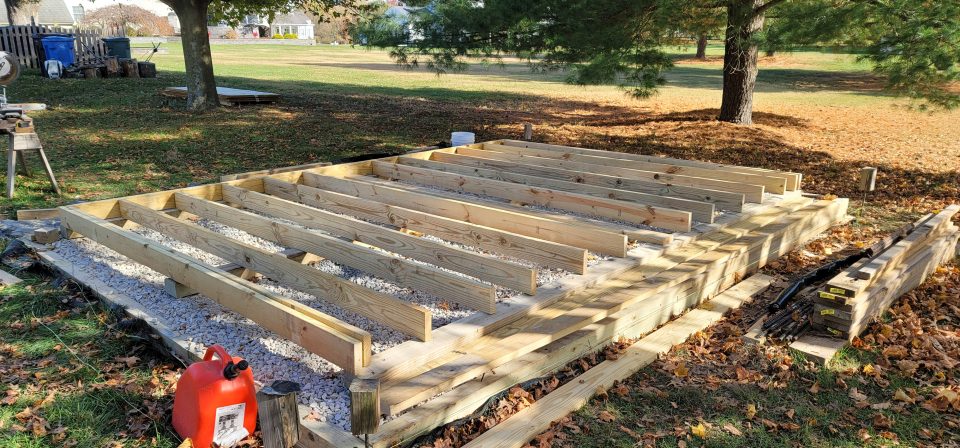
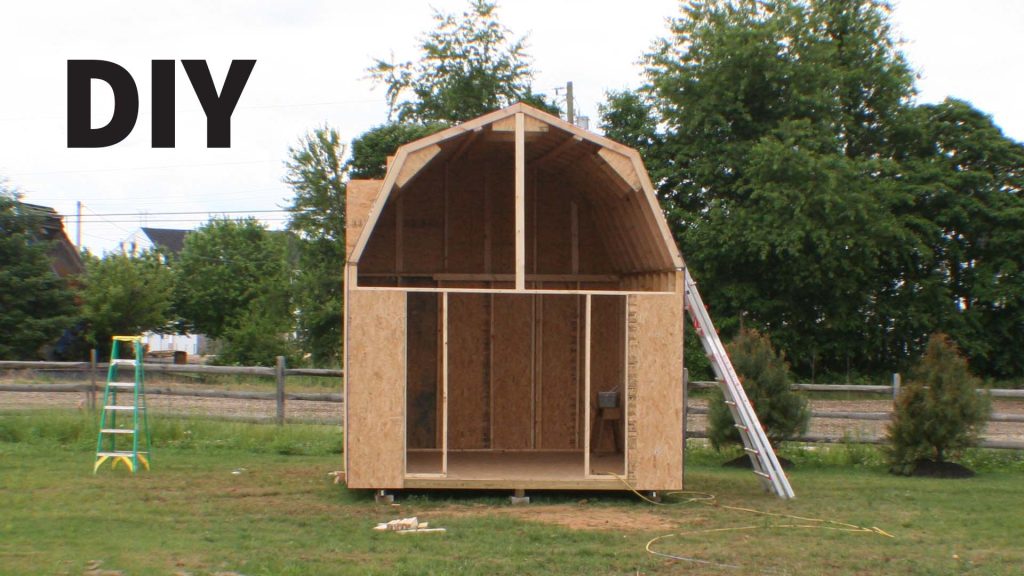
The shed floor construction of my Do It Yourself Shed is complete. My plans called for (4) 2x6x16 for the rim joists and (15) 2x6x12 for the floor joists. The rim joists were doubled up and so were the outer floor joists. I added the extra joists to improve the strength. I’ve seen triple joists in many designs but I didn’t think it was necessary for my 12×16 shed.
Shed Floor Construction
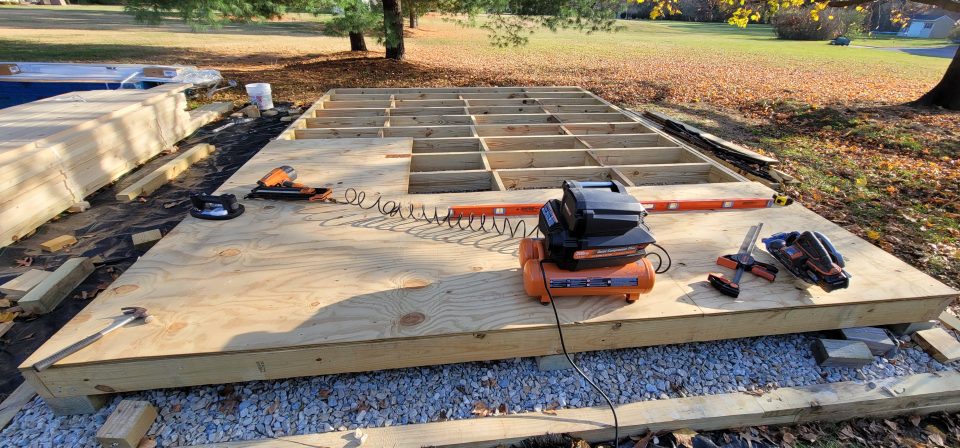
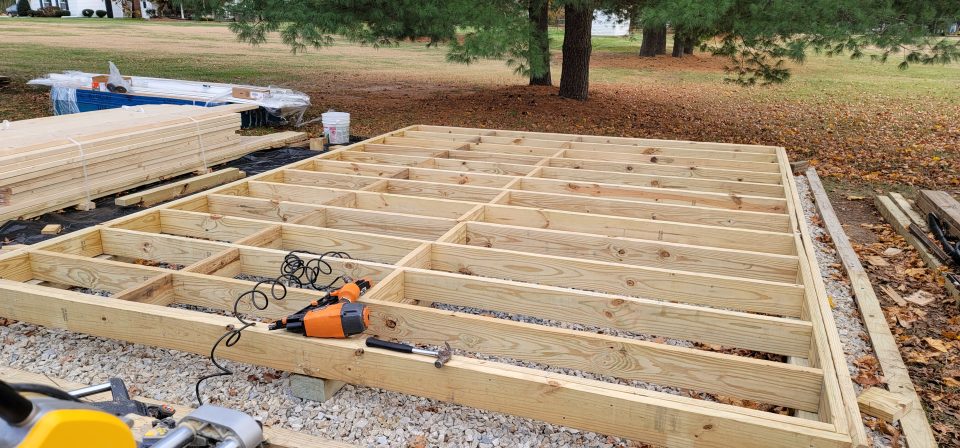
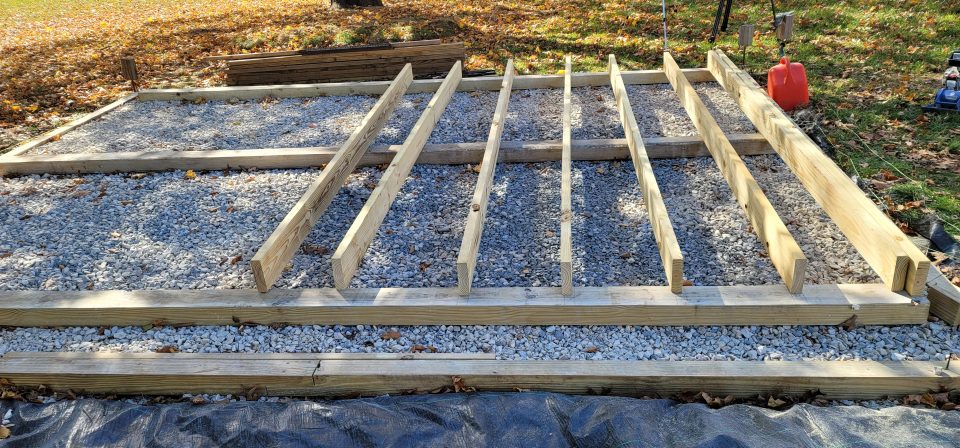
Three 4x6x16 timbers are flat on compacted 3/4 clean gravel, which you can read more about here: Do It Yourself Build a Shed – Securing Timbers with Rebar. The timbers are spaced on 6-foot centers to span 12 feet and level within 0.15 degrees. The rim joists sit along the length of the outermost timbers. The floor joists partly rest on the outermost timbers but a portion of the load is shared with the middle timber. I did this to minimize bounce and increase the strength of the floor. Since the floor joists rest on the timbers there was no need for joist hangers.
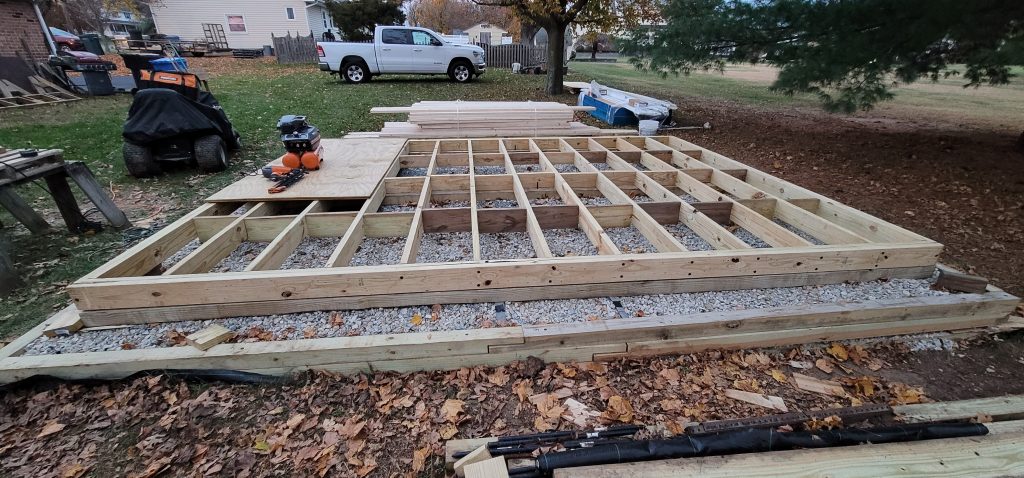
Blocking is installed between each set of floor joists alternating every other 1 1/2 inches on 4-foot centers from front to back. The blocking was added to prevent twisting of the floor joists under load. Blocking also provides another connection point between the flooring and the floor joists.
Tools Required
I used the following tools:
- Miter Saw
- 3 1/2 inch pneumatic Framing Nailer
- Air Compressor
- Air Hose
- Pneumatic Tools Lubricant
- Framing Hammer
- Speed Square
- Carpenter’s Pencil
- Tape Measure
- Grabo Pneumatic Gripping Tool (used to handle 3/4 inch pressure-treated plywood)
- 7 1/4″ Circular Saw
- Track Saw Straight Edge (for circular saw)
These tools are available in my Amazon Influencer Shop:
But, the flooring could have been constructed with a minimalist set of tools:
- Carpenter’s saw
- Tape Measure or Ruler
- Framing Hammer
- Speed Square
- Carpenter’s Pencil
- Chalk Line
Materials Required
I used the following materials:
- 4x6x16ft timbers
- 2x6x16ft lumber
- 2x6x12ft lumber
- 4x8x3/4 pressure-treated plywood
- 2-inch collated ring shank nails
- 3 1/4 inch collated framing nails
Building Process
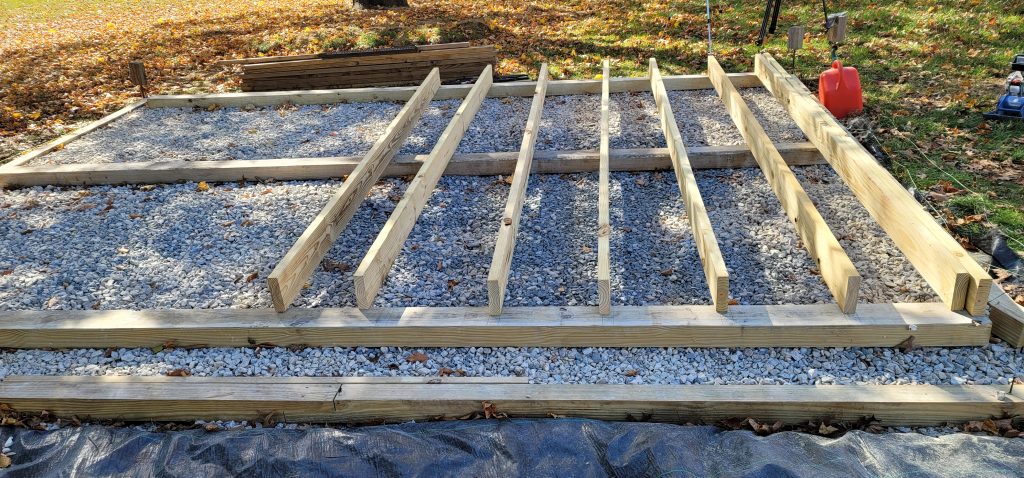
Once the timbers were level I began the construction of the floor starting with the innermost rim joists. My plans specify that the innermost rim joist length at 189 inches. This is so that these innermost rim joists will fit within the outermost floor joists. The innermost rim joists span from the front to the back and serve as the direct connection point for each floor joist. Starting with the rim joists I marked out the points for each floor joist to sit at 16-inch centers. This is crucial for 4-foot by 8-foot sheets of plywood so that they break in the middle of the floor joist.
I used my tape measure to mark the point of each floor joist. Then at each spot, I marked 3/4 of an inch to the left and 3/4 of an inch to the right. This is so that the 1 1/2-inch thick joist will sit right at the correct location. I used my speed square to draw a vertical line down on the inside of the rim joist at each 3/4 inch left and right mark. These two lines at each joist location serve as a reference for the true vertical installation of the joist.
Let’s Build
I repeated the same measuring process on the opposite innermost rim joist. Then I began the assembly of the floor joists to the innermost rim joists. I used my Ridgid Pneumatic Framing Nailer with 3 1/4-inch Grip-Rite coated galvanized framing nails. I shot three nails from the outside of the rim joist through to the floor joist. Then I also installed a few toe-nails on each floor joist providing an additional connection point. This same nailing pattern was repeated on the opposite rim joist. I also used 5-inch HeadLOC lag screws by FastenMaster to secure the inner rim joists to the floor joists.
I cut the outer rim joists to 192 inches, which is 16 feet, and installed them on the outside of the inner rim joists. These were installed with my framing nailer. But, then I also used a few HeadLOC lag screws to provide an additional connection point.
Mistakes were Made
Now I’m ready to install the pressure-treated plywood. The Grabo vacuum gripper is a great tool to handle sheet goods. I used it to grip onto the sheet of plywood and bring it over to the floor. It was quite a challenge since the plywood was so heavy. Using my Ridgid Pneumatic Framing Nailer and Grip-Rite Ring Shank 2-inch coated galvanized nails I was ready to fasten the sheet.
You know when something doesn’t seem right? Looking at the plywood sheet sitting on the floor joists I could see that the floor joists were not straight. As I stared at this in a confused manner I tried to conceive of the best plan. I figured the best thing was to pull a tape measure and double-check. The floor joists at the left inner rim joist were perfect. However, beyond the fifth-floor joist on the right inner rim joist, they were shifted by a whole board width. They were off by 1 1/2 inches.
Must Fix It
I knew that this had to be corrected. The way to do this was to remove the outer rim joist followed by disconnecting the offset floor joists. Then measure, mark, and reconnect the floor joists at the correct points on the inner rim joist. What I learned in the removal of the outer rim joist is that the Grip-Rite 3 1/4 inch framing nails are insanely strong. I needed my Craftsman demolition pry bar to remove the outer rim joist. Once removed, I used my DeWalt reciprocating saw and a 10-inch metal cutting blade to cut all of the nails flush. The only alternative was to cut the nails flush.
Next, I removed the HeadLOC lag screws with my impact driver. Then I used my hammer to hit the inside of the rim joist to give a little gap between each floor joist and the inner rim joist. I needed just enough to get the saw blade of my reciprocating saw in there. The reciprocating saw worked well as I was able to cut every nail off of the offset floor joists. This mistake was a great lesson. You must fix your mistakes before you move on to the next step. Otherwise, your construction will be built on top of a mistake.
Reassembly
This was a great lesson and I began reassembling the right side of the floor. I got everything assembled, including using the framing nails and HeadLOC lag screws. With the completion of the floor assembly, we’re ready to attach our first piece of plywood flooring. Again, I stared at the floor and something didn’t look correct. I pulled a tape measure and my measurements, although correct were also incorrect. They were based on a bad starting point where I measured from and I had to redo all of this again.
The amount of effort put into fixing a mistake that was made twice would not have been good if this were a job. But, I knew this had to be done and I wanted this shed built right. So I repeated everything by removing the outer rim joist and cutting all of the fasteners attached to the offset floor joists. Then I put everything back together again. This added two days to my scheduled time when I expected to begin framing the walls.
This was a big lesson for me to double-check all measurements and not assume other measurements and markings were correct.
Blocking
My plans specify the installation of blocking from front to back between each floor joist with a 1 1/2-inch offset pattern on 4-foot centers. You can use scrap pressure-treated 2×6 lumber and even some 2×8 lumber to serve as the blocking. It is best to use 3 1/4-inch framing nails to install the blocking. The nailing schedule requires nailing through the floor joist into the ends of the blocking. Additionally, toe-nailing is specified to provide additional strength. This is a solid combination of fastening with nails based on my experience of attempting to disassemble the rim joists.
Flooring
Now we’re able to move on to the flooring. The plans call for the flooring installation of an offset pattern of a 4-foot by 4-foot section of plywood followed by an 8-foot by 4-foot section of plywood. This pattern alternates for extra strength in the flooring. I used the Grip-Rite 2-inch ring shank nails to fasten the plywood to the floor joists and the rim joists. The nailing pattern followed was every 6 to 10 inches.

The Do It Yourself Experience
I am very happy with the progress I’m making with building the shed. If I were to do it all over again, I would double-check my measurements from known reference points. I would not rely on the markings I made in the wood for pulling my measurements. My mistakes were learning points to not trust the initial set of measurements. But, it also proved to me that fixing the mistakes is very important before moving on to the next stage of construction.
The tools that I had to purchase were minimal as I already owned what I needed. I purchased the tools with the additional purpose of filming content using them for my channel and also for my influencer shop. One may have to strike a balance between schedule and cost.
Goals
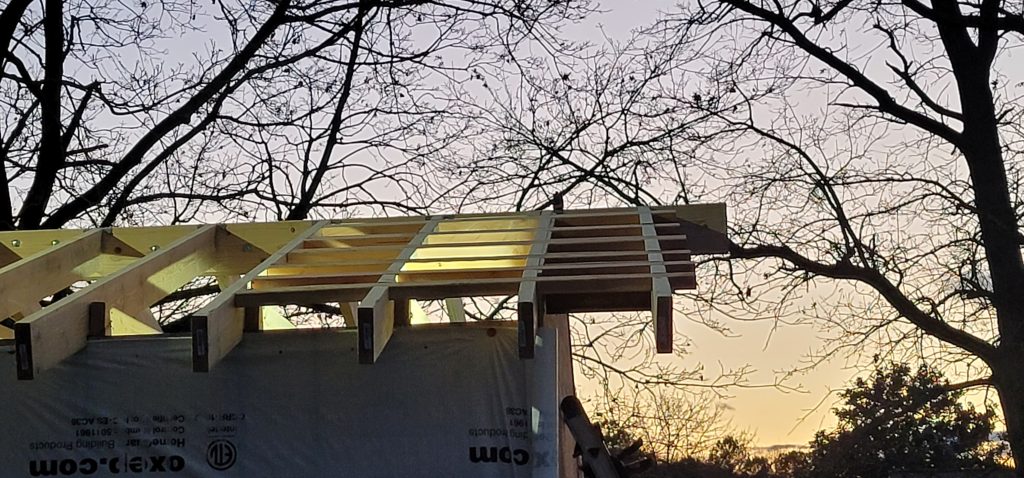
Since I’m building it myself I can take as long as I see fit to construct it. However, I did set a goal to have the roof completed before the end of the year. And I met that goal close to the final week of 2023. You may also be able to take advantage of unlimited time but there will always be something that will hinder you or force you to speed up the construction.
Weather played a part in my construction, which is why I set the goal of completing the roof by the end of 2023. This way I can set up my tools in the shed to build the doors and construct the ramp in 2024. The tools will be under a dry roof and I can take my time.
Every time I look at the shed I know that it is built with my highest quality workmanship.
“As an Amazon Associate I earn from qualifying purchases.”
Video Credits:
Video Production: U Do It™️ Studios a Division of No Cheese Records® LLC All Rights Reserved.
Do It Yourself Build a Shed Series
To learn more about this series check out the DIY Build a Shed Series here.

Picked out for you
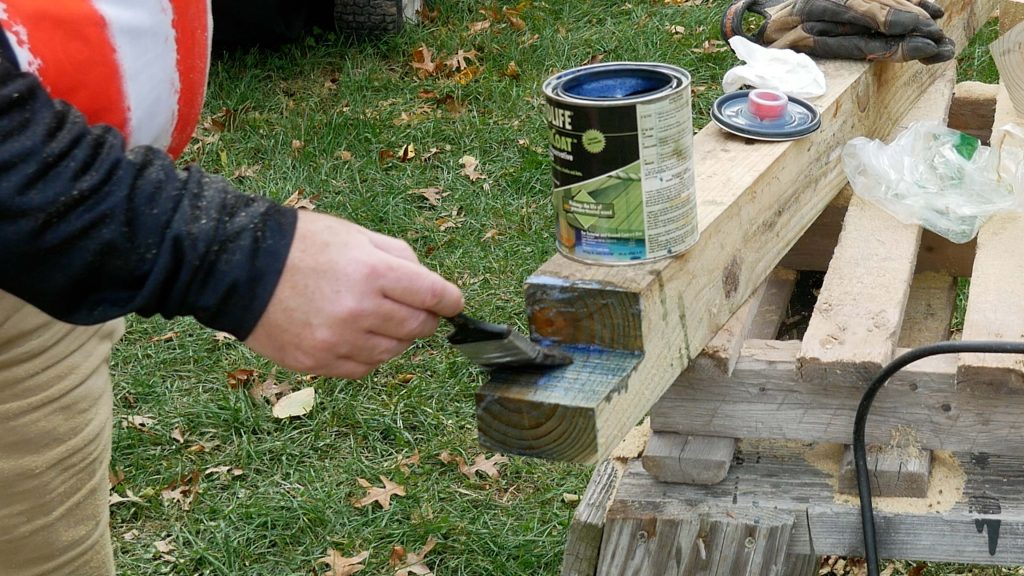
Great Product: Do It Yourself Build a Shed – Woodlife Copper Coat Wood Preservative – By U Do It
Do It Yourself Build a Shed – The DIY Experience – By U Do It
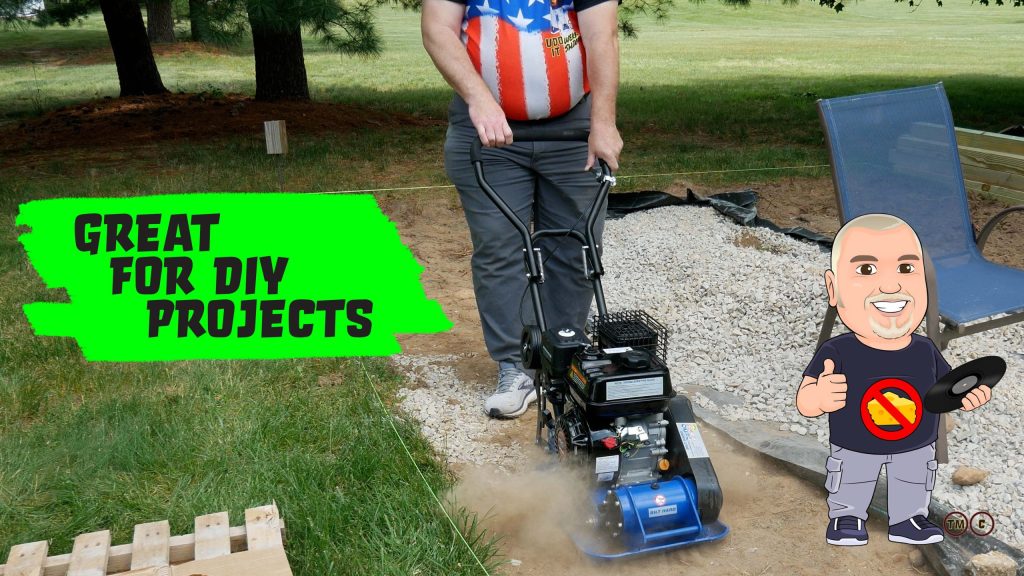
Incredible Tool: Do It Yourself Build a Shed – Bilt Hard Plate Compactor – By U Do It

Do It Yourself Build a Shed – Where to Start – By U Do It
Do It Yourself Build a Shed – Planning and Estimating – By U Do It

Protect your Cabinets with Drawer and Shelf Liner – By U Do It
Our Kitchen Storage Is Lacking – DIY Pantry Cabinet – By U Do It
The First Cut – DIY Pantry Cabinet Part 2 – By U Do It

Do It Yourself or Hire a Contractor – By U Do It
Garage door wont close unless I hold the button down – By U Do It
How to Install a Door Lever for a Bedroom – By U Do It

Save money by rebuilding your grill burners – By U Do It
Music of the Day

Follow U Do It on Social Media


What’s next? Check out About U Do It, History of U Do It, and Mrs U Do It to learn even more about U Do It.