You’re considering purchasing a Peloton Original bike trainer, but you’re looking for more details. In this video you’ll learn more about it’s mass based on my comedic yet serious reaction while learning the basic setup of the bike, connecting the bike to the internet and creating a Peloton account. Please note that the Peloton Original rider max weight according to the specifications is 297 pounds. Although I far exceed this weight capacity, I’m still using the bike. Therefore, it may fail and if it does I’ll report back here.
My above video was first released on amazon to help consumers decide if a Peloton bike is right for them and it is titled Ride with friends in the comfort of your home I then wrote this article to further help out all of you with getting to know Peloton and their products even more so you can make the right choice if you are on the fence about buying a Peloton Bike.
I uploaded my original video above to other social media outlets with different titles linked below for your ease of use.
Facebook: How a fat man exercises on the cheap!
Instagram TV: Anyone can upgrade or start their home gym and get into shape fast!
YouTube: Burning off a year supply of Snickers with my Peloton Bike
YouTube: You’re considering a Peloton – Setup and Getting Started
My #1 goal in life is to help others while I have fun in the process.
The complete video asset in all versions is owned by No Cheese Records LLC, and managed, produced and filmed by U Do It Studios.
Men’s shirt worn in this video is: U Do It Chlorophil Muscle Shirt provided by U Do It Shop for this video.
Enjoy this awesome article. – U Do It.
You will find the Peloton Original as well as other recommended items under my Exercise & Wellness list here: https://amzn.to/44eE6NT
Moving the Peloton Original alone is not ideal because the bike is extremely heavy. I was able to drag it up my stairs as you can see in this video but it was a risky maneuver doing this alone.
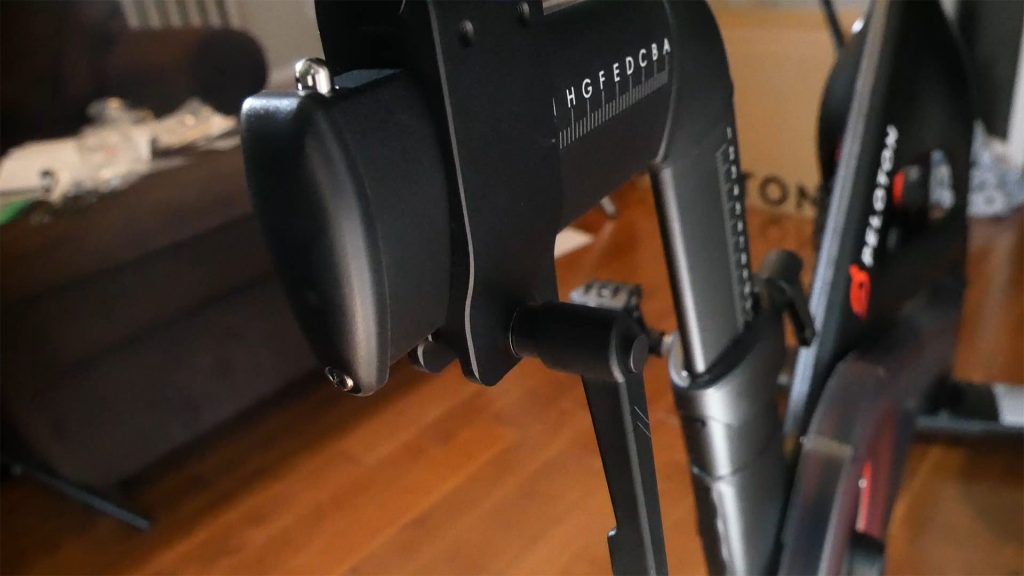
Video Chapters
0:00 How heavy is the Peloton Original
0:12 Unboxing and unwrapping of accessories
1:00 Reading the assembly instructions
1:50 Installation of the feet
2:37 Adjustment of the feet
2:44 Installation of the handlebars
3:34 Installation of the pedals
3:54 Installation of the display
4:24 Power up of the bike
4:40 Setup of the touchscreen display
5:08 My first ride and it was awkward
5:55 Adjusting the seat for more comfort
6:15 Scan the QR Code to setup account on your phone
7:00 Welcome to Peloton
7:44 My first course on the bike
9:44 Review of the features
10:44 Resistance adjustment knob
Assembly Instructions
This video may help answer some questions you may have prior to your purchase, however, when setting up the bike it is recommended that you read the manual and the errata sheet. My learning style I prefer to read a user guide while consulting a video at the same time. For example, me and Ikea furniture have a love hate relationship. Things would be so much better if a video were to be provided with the assembly. Use care when removing components from their boxes, especially with the display. It is recommended to keep the display in its box until you are ready to mount it. One thing that may save you time regarding the assembly of the display to the mount, is that the screws to attach the display to the mount are within the display package (it is a small package).
Installation of the Feet
If you have a solid floor surface, like tile or wood, you may want to place a moving blanking under the bike. A moving blanket will provide some additional padding in case you drop something. And it will also help when you have to lay the bike on its side to assemble the feet. It is best to have another set of hands holding the bike while you attach the feet to the base of the bike. After you secure the base, adjust the feet so they are out a little. Also, by do this it will make it easier after you turn the bike upright again.
Handlebars
There are two components of the handlebars that you need to assemble prior to installing it on the frame: Hold the handle bar support onto the the handbars support mount while securing the screws. Once this is secure you can attach the handlebar assembly to the bike frame.
Pedals
The pedals have two different direction threads, therefore you want to install the correct pedal to the correct side. Once installed, you can use the attached wrench to secure the pedals.
If you are interested in other Health & Wellness articles visit Mrs U Do It.
Picked out for you
If you are interested in other U Do It™ articles you can find them here.
Picked out for you
DIY Acoustic Panels for Better Sound Treatment – By U Do It
Replacing an Edger Blade is Easy with the Right Tools Video – By U Do It
Making DIY tile coasters is super easy with cork – By U Do It
Save money by rebuilding your grill burners – By U Do It
How to paint two tone colors with a laser level – By U Do It
How to install a GFI outlet in basement from start to finish – By U Do It
Repair a Leaky Gutter with Flex Seal – By U Do It
Replace your air filter as part of your regular maintenance – By U Do It
How to Remove Car Pinstripes using an Eraser Wheel – By U Do It
Music of the Day
Follow U Do It on Social Media
What’s next? Check out About U Do It, History of U Do It, and Mrs U Do It to learn even more about U Do It.


